Sebelumnya saya sudah membuat catatan tentang bagaimana saya melakukan setup local env saya supaya dapat mulai bekerja dengan Spring di Ubuntu, tapi untuk video ini saya menggunakan laptop Win10 milik kantor.
Pada catatan belajar saya kali ini saya memulai dari video berikut ini yang berjudul "How to Create a Spring Boot Web Application".
How to Create a Spring Boot Web Application
A step-by-step video tutorial that teaches you how to develop a Spring MVC web application with JSP/ThymeLeaf using Spring Boot and Eclipse IDE.
01:43 Create SpringBoot Project
13:46 Create Welcome Page
18:31 Create Spring Controller Class
22:48 Create Domain Model Class
24:24 Create Business Class
31:06 Use JSP with SpringBoot
47:52 Use ThymeLeaf with SpringBoot
55:15 Configure Logging
58:47 Configure Tomcat Server
1:03:17 Package to Jar (ThymeLeaf)
1:07:59 Problems with JAR packaging (JSP)
1:09:52 Package to WAR (JSP)
Read the article: http://www.codejava.net/frameworks/sp...
Download sample project here: http://www.codejava.net/download-atta...
Versi Java yang saya pakai
1. Generate Spring Project https://start.spring.io/
Download dan Generate project sebagai zip.
Extracted project.
Updating maven project configuration.
Sabar hingga ini selesai.
Maven Project created and ready.
2. Hapus Test karena tidak dibahas di Video
Hapus test file dan juga dari pom.xml.
Hasil penampakan setelah dihapus.
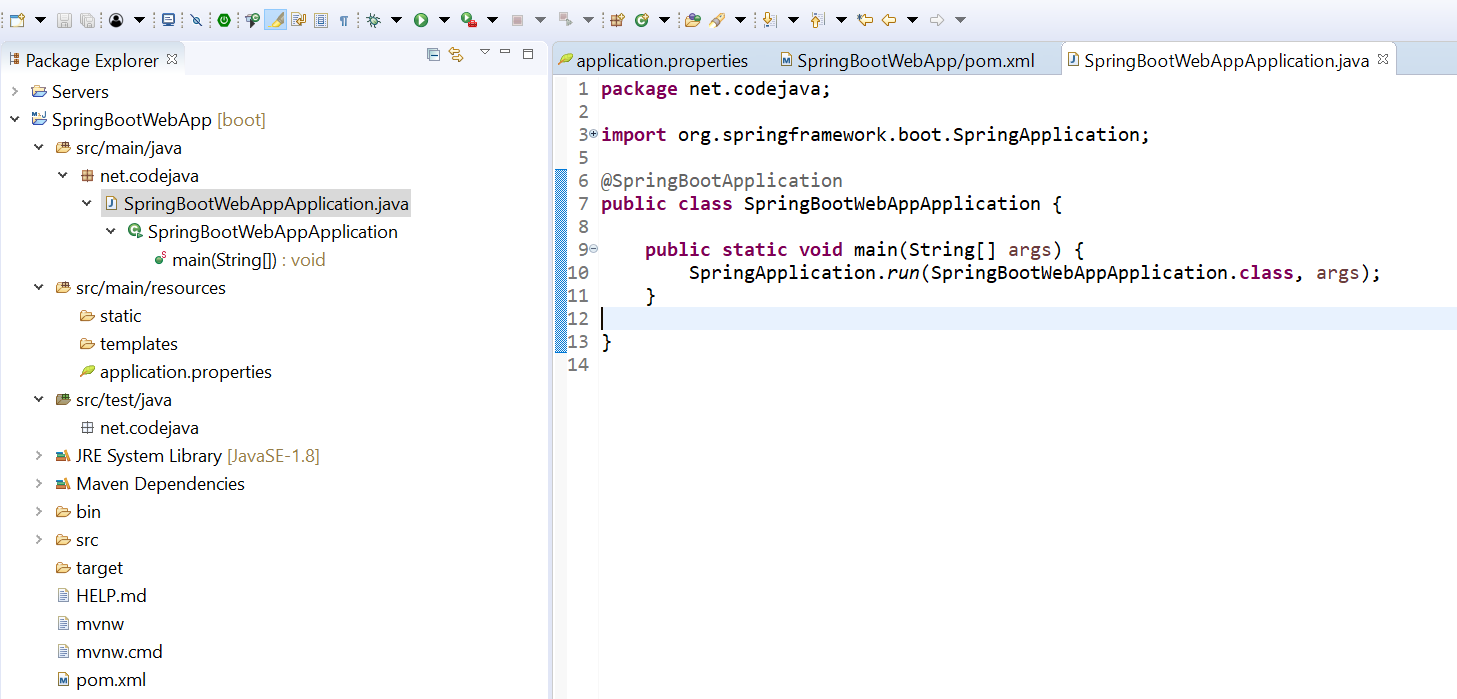
3. Main Class dari Aplikasi
Main Class
4. Running Project
Run Spring Boot App
Running Project
5. Buat Model Class
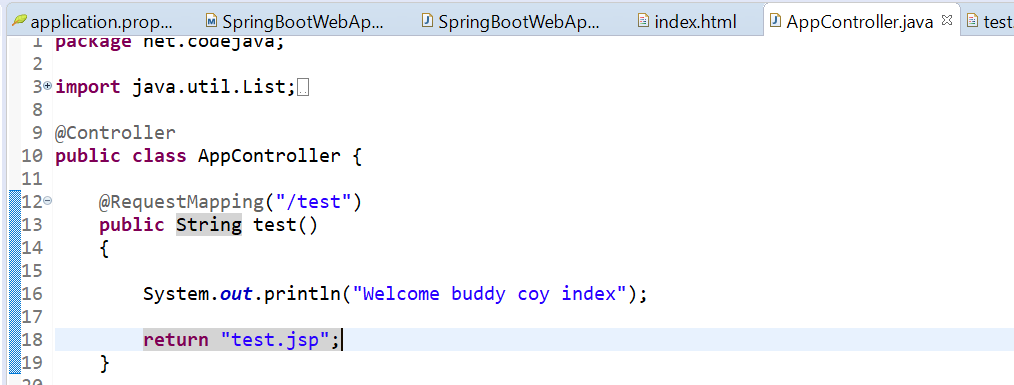
6. Buat Model Business dan Controller
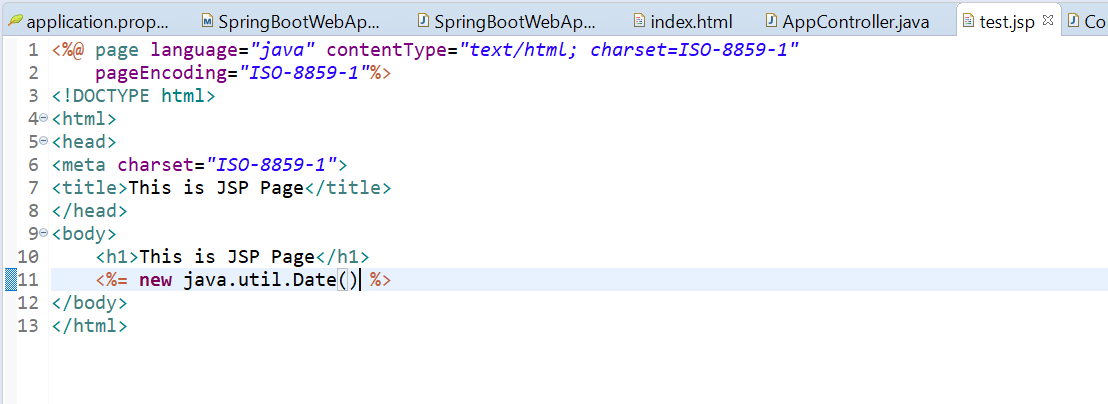
7. Setup JSP Support
> Install Java EE Tools
> Menambahkan dukungan JSP - Standard Server Page (JSP)
Dependency untuk JSP
Dependency untuk JSP
> Kode Untuk test JSP
> Test Running JSP
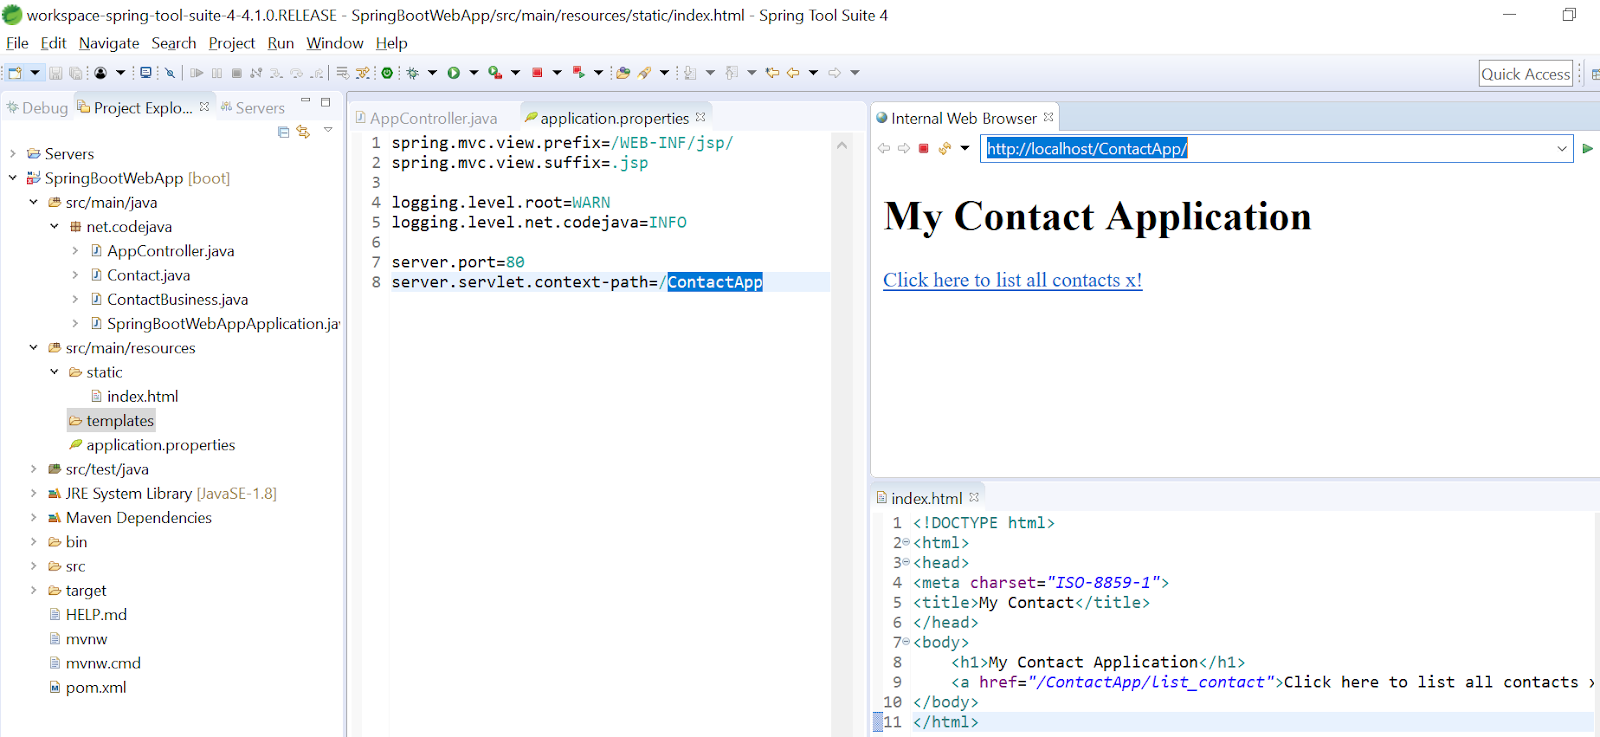
> Set JSP View Suffix dan Prefix
Set prefix folder lokasi dan suffix untuk extension
8. Buat Halaman Contact
> Index
Buat index.html lalu run as spring boot app
Hasilnya ditampilkan di browser (Bila diklik akan ke list contact dibawah)
Semalam kemarin (09 Januari 2019) tidak sengaja kami sekeluarga lewat Bandung Digital Hub saat pulang dari Fish Wow Cheeseee yang di Jl. Lombok. Bandung Digital Hub ini sendiri berlokasi tidak jauh dari dari tempat kami makan tersebut, yaitu berlokasi di Jl. Laswi No.7, Kacapiring, Batununggal, Kota Bandung, Jawa Barat 40271. Berhubung untuk bulan Januari 2019 ini sedang tidak masuk ke kantor maka saya putuskan untuk besoknya (hari ini 09 Januari 2019) nyoba untuk bekerja remote dari Bandung Digital Hub , apalagi istri yang kebetulan follower pak Ridwan Kamil di Instagram juga Facebook dan tampaknya pernah lihat ulasan mengenai tempat ini sehingga tampak antusias supaya saya datang ketempat ini ini dan mencoba bekerja dari gedung creative hub dan coworking yang keren ini. Tempat Parkir Masalah utama saat kita datang ke coworking space terutama yang berlokasi di Bandung (atau mungkin kota-kota lainnya) adalah lahan parkir, kadang lahan parkir ...
Untuk memaksimalkan efisiensi saat mengembangkan proyek Laravel, penggunaan alat debugging menjadi sangat penting. Di sinilah Xdebug berperan—ekstensi PHP yang memungkinkan kita untuk melacak alur eksekusi kode, memeriksa nilai variabel, dan menemukan bug dengan presisi tinggi. Tutorial ini akan memandu Anda langkah demi langkah dalam menyatukan kekuatan Laravel , Xdebug , dan IntelliJ IDEA , salah satu IDE terbaik untuk pengembangan PHP. Kami akan membahas proses instalasi dan konfigurasi dari awal hingga akhir di lingkungan Ubuntu , memastikan Anda memiliki semua yang dibutuhkan untuk debugging yang mulus dan efisien. Mari kita mulai. Langkah 1: Mempersiapkan Lingkungan Pengembangan Pertama, pastikan Anda telah menginstal PHP , Composer , Node.js , dan npm di sistem Ubuntu Anda. Laravel memerlukan semua ini untuk bekerja dengan baik. Meskipun tidak wajib, Node.js dan npm sangat penting dan hampir selalu digunakan dalam alur kerja pengembangan Laravel moder. Langkah 2: Meng...
Panduan Lengkap untuk Developer Indonesia Mengubah Laptop Menjadi AI Pair Programmer Membangun AI Development Assistant lokal dengan Ollama, DeepSeek Coder, IntelliJ IDEA, Continue.dev & OpenClaw Ollama DeepSeek Coder IntelliJ IDEA Continue.dev OpenClaw 🆓 Gratis 📡 Offline 🔒 Privat ⚡ Cepat Bagian 1 — Pembuka Masa Depan Pengembangan Software Kamu sedang stuck di sebuah bug yang membingungkan pukul 2 pagi, menjelang deadline sprint. Kamu mengetik komentar singkat: "Review fungsi ini, apakah ada potensi memory leak?" — dan dalam hitungan detik, sebuah asisten AI menganalisis kode-mu secara mendalam, tanpa mengirim satu baris pun ke server eksternal. Ini bukan fiksi ilmiah. Ini adalah realita yang bisa kamu bangun hari ini , di laptop-mu sendiri, dengan tools open-source yang tersedia gratis. Revolusi AI dalam sof...


Comments
Post a Comment